
PhilHealth PMRF form: the member’s plain guide (2026)
One form does more PhilHealth jobs than any other, and most people only meet it when they’re already in a rush. Here’s what it is, which copy to grab, and how to get through every field once, without a second trip to the branch.
Short version: the PhilHealth Member Registration Form (PMRF) is the paper (or online) form you use to register as a member, update your details, or add a dependent. You fill it in, attach a valid ID and any supporting document, and hand it to a branch or submit it online. PhilHealth reads it to create or correct your record. It is free, and no legitimate channel charges you to “process” it.
On this page
I’ve watched this one form cause more small headaches than anything else in the PhilHealth process. Not because it’s complicated. Because people treat it like a formality, breeze through it, and then find out three months later that a single mismatched letter is holding up a claim or a dependent’s coverage. I’ve filled it out for myself, redone it after a botched first attempt, and sat beside relatives while they worked through theirs. The pattern is always the same: the form is quick, but the fields you rush are exactly the ones that bite.
So this isn’t a caption of what the boxes look like. It’s the walkthrough I’d give you in person, PDF open between us, pen in hand.
What the PMRF actually is
PMRF stands for PhilHealth Member Registration Form. Think of it as the front door to your PhilHealth record. Almost every membership transaction you’ll ever do (signing up, changing your surname after marriage, adding a baby, fixing a wrong birth date) passes through this same form. You write; PhilHealth reads and files.
People sometimes call it the PhilHealth member registration form PMRF in full, or just “the registration form.” Same document. What matters is that it captures three things: who you are, what member type you fall under, and who your dependents are. Get those right and the rest of your PhilHealth life gets a lot smoother.
Which PMRF version is current
Here’s a detail most guides skip, and it trips people up constantly. There is more than one PMRF floating around online, and PhilHealth only accepts the current one.
The copy in circulation is the UHC v.1 (January 2020) edition, released under the Universal Health Care Act. It’s a two-page form, it can be freely reproduced, and it is marked “not for sale,” which is your first clue that anyone charging you for a copy is not a real PhilHealth channel. That version has held for a while, but PhilHealth does revise its forms without much fanfare, so don’t trust a random PDF you saved years ago.
Print two copies if you’re heading to a branch. Ballpen slips happen, and a clean spare beats standing in line with a form full of scratch-outs. Small tip, saves a genuinely annoying afternoon.
When you actually need one
Four situations cover almost everyone who reaches for a PMRF:
| Your situation | What you tick / do |
|---|---|
| First-time member, no PIN yet | Registration. Leave the PIN field blank. |
| Changed surname, address, or civil status | Updating / Amendment. Show old and new. |
| Adding a spouse, newborn, or qualified parent | Updating / Amendment. Fill the dependents block. |
| Wrong name or birth date on record | Updating / Amendment, plus a PSA document to prove the correct detail. |
If you’re genuinely not sure which bucket you fall in, that usually traces back to your membership category. Sort that out first, because it decides which boxes you tick further down.
Filling it out, field by field
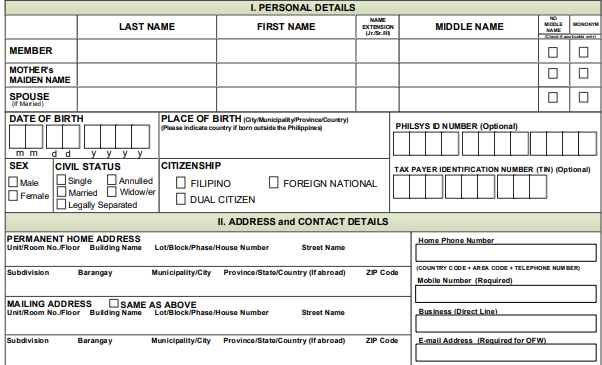
This is the part people search for: how to fill up PhilHealth form PMRF without second-guessing every line. One rule before you start, write in capital letters throughout, since that’s how the form asks for it and it cuts down on misread handwriting. Now, top to bottom.
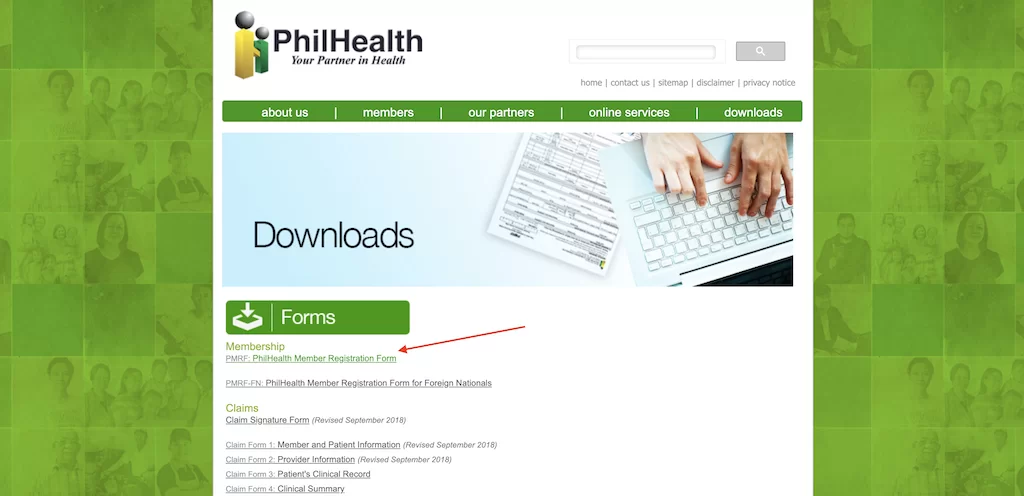
Start with the right PDF
Grab the current copy from the official downloads page first. I know I keep repeating it, but an outdated form is the most avoidable rejection there is. Two minutes now versus a wasted trip later.
Your PIN, if you already have one
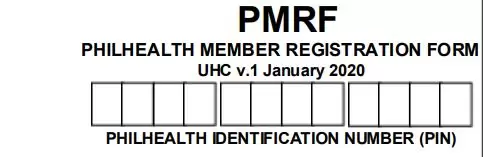
Updating an existing record? Your 12-digit PhilHealth Identification Number (PIN) goes up top. Brand-new applicant? Leave it empty. PhilHealth issues the number once your registration is processed. And if you know you have a PIN somewhere but can’t find it, don’t register again and create a duplicate. Recover it first through our lost PhilHealth number guide. Duplicate records are a headache to untangle.
Pick your purpose
One checkbox, and it changes how everything below gets handled. “Registration” if this is your very first PhilHealth record. “Updating/Amendment” for everything else, whether that’s a new address, a corrected name, or a dependent you’re adding. When in doubt and you already have a PIN, it’s an update.

Your name, matching your PSA record
Write your full legal name the way your PSA birth certificate spells it, middle name in full, no shortcuts. Not the version on your office ID, not the one you’ve written casually for years. If any of those differ from the PSA, PhilHealth follows the PSA. Married and updating your name here? Add your spouse’s full name where the form asks.

Birth details, sex, civil status, citizenship
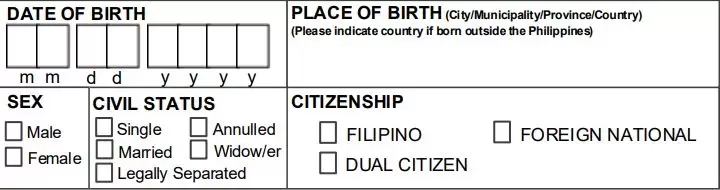
This block wants your date of birth, place of birth (city or municipality and province, plus the country if you were born abroad), sex, civil status, and citizenship. The date is the sneaky one. PhilHealth uses MM/DD/YYYY, and it’s easy to autopilot into DD/MM if that’s your habit. Slow down for that single line.
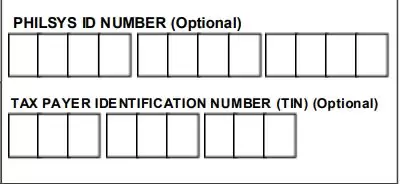
PhilSys ID and TIN (optional, but useful)
Both are optional. Still, if your PhilSys National ID number and TIN are handy, put them in. They give PhilHealth a second way to confirm it’s really you when they cross-check against other government databases, which can save a follow-up down the line. No numbers on hand? Skip them and move on. Nothing breaks.
Address and contact details
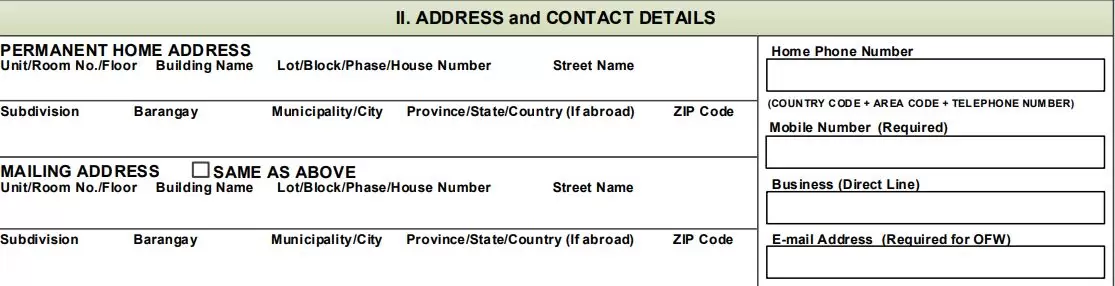
Give both your permanent and current mailing address. If they’re identical, write “SAME AS ABOVE” rather than leaving the second one blank, since an empty field reads as an oversight to a reviewer. Use a phone number and email you check, because that’s where any problem with your application lands. If you’re unsure which supporting documents your address needs to line up with, the requirements guide covers it.
Declaring dependents
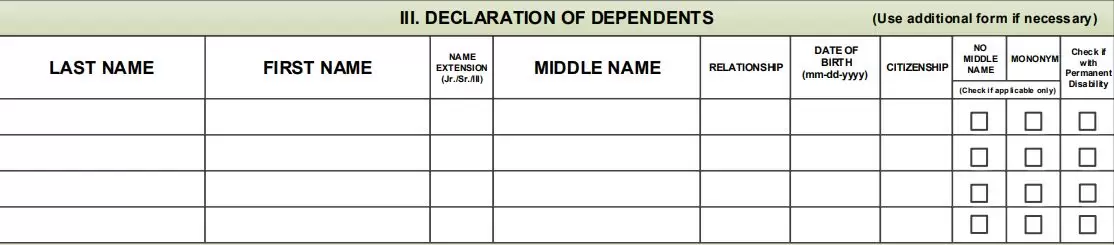
This is the block that confuses the most people, so read it slowly. Only some people qualify: your legal spouse (if they aren’t an active member on their own), unmarried children below 21 (or any age with a qualifying permanent disability), and parents aged 60 and up who aren’t active members themselves. Write each one’s full name, birth date, and relationship to you, one per row.
Member type and income
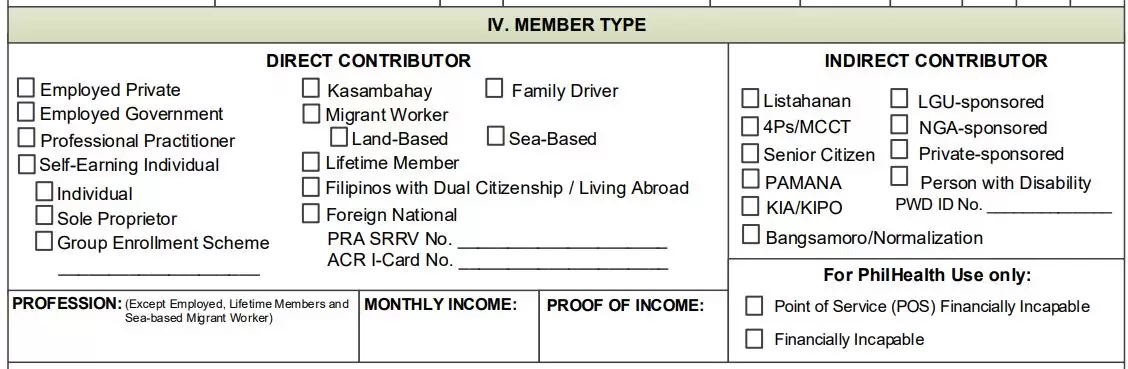
Tick one category only (employed, self-employed, voluntary, OFW, and so on) and declare your profession and monthly income where asked. This sets your contribution bracket, so it’s worth a moment’s thought rather than a guess. For 2026, the premium is 5% of monthly basic income, with a ₱10,000 floor and ₱100,000 ceiling, so ₱500 at the low end and ₱5,000 at the top, per PhilHealth’s May 6 advisory reported by PIA. Want the exact peso figure before you commit? Run it through the contribution calculator.
Updates: show the before and the after
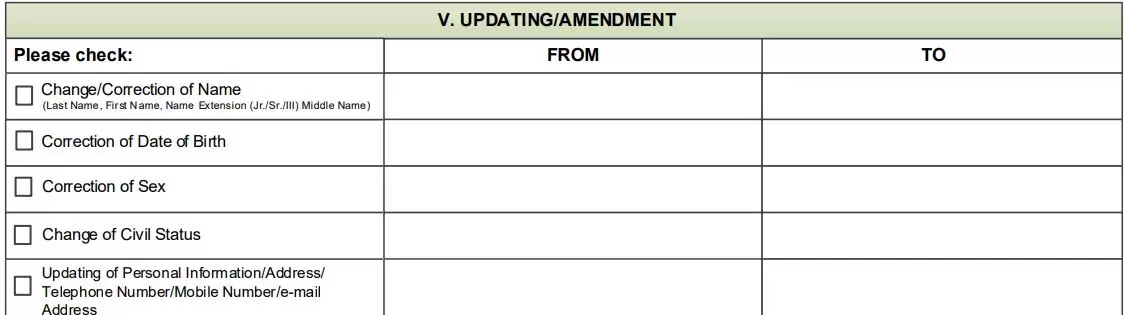
When your purpose is “Updating/Amendment,” the form usually gives you an old-info column and a new-info column. Fill both. PhilHealth needs to see what changed, not just the corrected version sitting on its own. Writing only the new detail is a quiet way to get the update kicked back.
Sign it
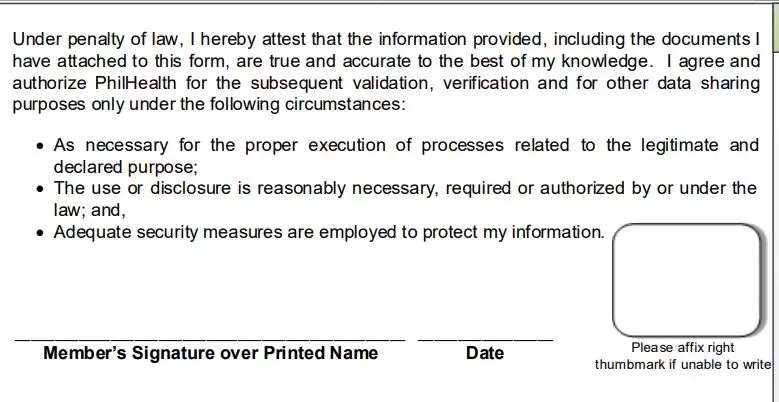
Obvious, and still one of the top reasons forms bounce. An unsigned PMRF is rejected on sight. Sign the way you sign your valid ID. Can’t write? A thumbmark is accepted. And leave the box marked for PhilHealth staff use completely alone, the receiving officer fills that in, not you.
Doing it online instead
You don’t have to print anything. The Member Portal collects the same information as the paper PMRF, just typed. If you’d rather skip the branch entirely, this is the route.
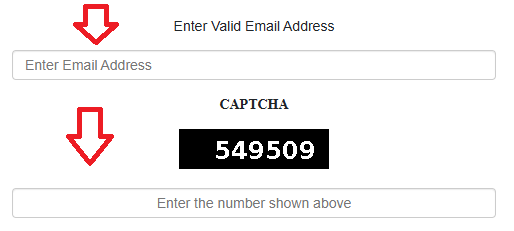
It opens by asking for your email and a CAPTCHA, confirming you’re a person before anything else.
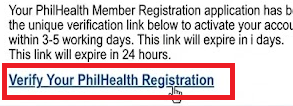
PhilHealth then sends a verification link. Click it before the session times out, or you’ll redo the email step.
After that, you type in the same personal details, address, and membership info the paper form asks for.
Submit, and your PIN arrives by email instead of being handwritten at a counter. The full run-through, including what to do when the verification email never turns up, lives in our online registration guide. Prefer to hand your papers to a person? Booking a PhilHealth online appointment ahead of time spares you the walk-in queue, which gets long at busy branches fast.
The PMRF for employers
Hiring side? The PMRF doesn’t go away, it just rides along in a bigger stack. Any new hire without an existing PhilHealth number needs a completed PMRF in your submission. On top of that, employers pull two more forms.
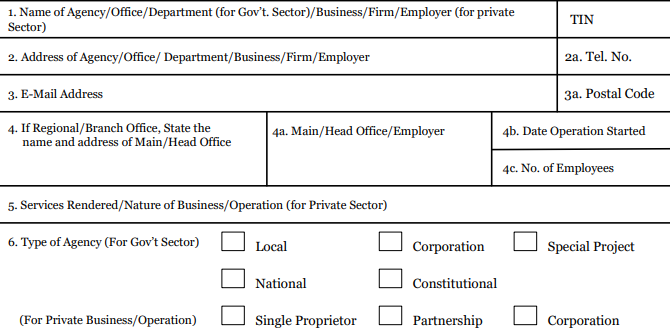
ER1 (Employer Data Record) holds your business details. ER2 (Employee List Report) lists your staff, with a PMRF clipped on for anyone who still needs a PIN.

You submit the lot (ER1, ER2, the attached PMRFs, and your business papers like DTI, SEC, or Mayor’s Permit, depending on your setup) to your Local Health Insurance Office (LHIO). Once it clears, you get your Employer Number (PEN) and Certificate of Registration, and a POAF submission switches on your Electronic Premium Reporting System (EPRS) login for remitting contributions.
Why PMRFs get sent back
From the forms I’ve watched bounce, here’s the short list worth checking before you submit, roughly in order of how often it happens:
- Name that doesn’t match the PSA certificate. A dropped middle name, a “Ma.” shortcut, a different spelling than your other IDs. This is the big one.
- Wrong member category. Usually an employed person marking “Voluntary.”
- Dependents with no backing documents. A name on the form and no birth or marriage certificate to prove the relationship.
- No signature. Rushed forms, especially just before a branch closes.
- An old version of the PDF. Re-download every single time.
After you submit: the MDR
Quick clarification, because these two get muddled constantly. The PMRF is the form you hand in. The MDR (Member Data Record) is what PhilHealth generates from it, the official proof that you’re active plus the list of your covered dependents. Hospitals ask for the MDR at admission, not your filled-out PMRF. If you’ve never printed yours, the PhilHealth MDR guide shows how to pull it from the Member Portal in a couple of minutes.
Timing-wise: walk-in submissions are usually processed the same day, and you can request your MDR soon after. Online submissions tend to land by email within a few working days. Updates to an existing record, like a new dependent, can take a bit longer to actually show up in the system, so don’t panic if your MDR doesn’t reflect the change the moment you get home.
Frequently asked questions
Where do I download the 2026 PMRF form?
From philhealth.gov.ph, under Downloads then Forms. The copy in circulation is the UHC v.1 (January 2020) edition, and it’s free. Skip PDFs on random blogs or social media, since PhilHealth revises the form now and then and an old copy is a common reason branches send people home.
Is the PMRF the same as the MDR?
No. The PMRF is the form you fill out and submit. The MDR is the Member Data Record PhilHealth produces afterward, showing your active status and listed dependents. Hospitals check the MDR at admission.
Can I fill out the PMRF online?
Yes. The Member Portal’s online registration captures the same fields, email verification, personal details, member type, and document upload, and your PIN comes by email instead of a handwritten one at the counter.
Do I need to pay to submit a PMRF?
No. Filing or updating a PMRF is free, online or at a branch. The form itself is marked “not for sale.” Anyone charging a fee to “process” it is not a legitimate PhilHealth channel.
What documents go with the PMRF?
At minimum, one valid government ID. First-time registrants usually also need a PSA birth certificate. Adding dependents means supporting proof too, a marriage certificate for a spouse, a birth certificate for a child.
Do I file a fresh PMRF every time I update something?
Yes, but it’s the same form. Tick “Updating/Amendment” instead of “Registration,” then fill the relevant section (address, dependents, civil status) with both the old and new details.
What’s the single most common mistake?
A name that doesn’t match the PSA birth certificate exactly, whether that’s a missing middle name or a spelling that differs from your driver’s license or company ID. PhilHealth follows the PSA.
Official sources
- PhilHealth Downloads and Forms — the current PMRF PDF and other member forms.
- PhilHealth official portal — Member Portal login and online registration.
- Philippine Information Agency — reporting on PhilHealth’s May 6, 2026 advisory confirming the 5% premium rate for 2026.
PDF open, cursor blinking on a blank field?
That’s normal, this form has more sections than it looks like at a glance. Work top to bottom, use the steps above one at a time, and if the documents side is where you’re stuck, our full requirements guide goes deeper on what to attach.
About this guide: Written from the member’s side of the counter, not by PhilHealth. I’ve registered, recovered a lost PIN, printed an MDR the night before an admission, and gotten a couple of these fields wrong the first time. This page is independent and isn’t affiliated with or endorsed by PhilHealth. Rates and rules change, so confirm anything time-sensitive against the official issuances before you act on it. Last reviewed August 2026.